How do you start building a plasterboard wall?

You want to make a plasterboard wall and are looking for information on how to do it
done? Our answers to the most important questions are sure to be helpful.

The decision to use steel profiles and plasterboard will be helped by listing the many advantages this type of construction has.

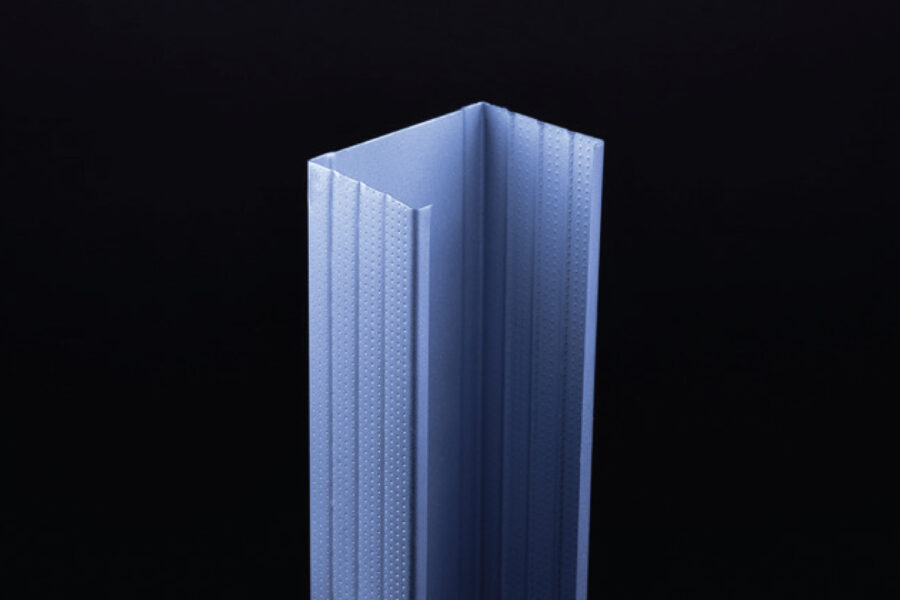
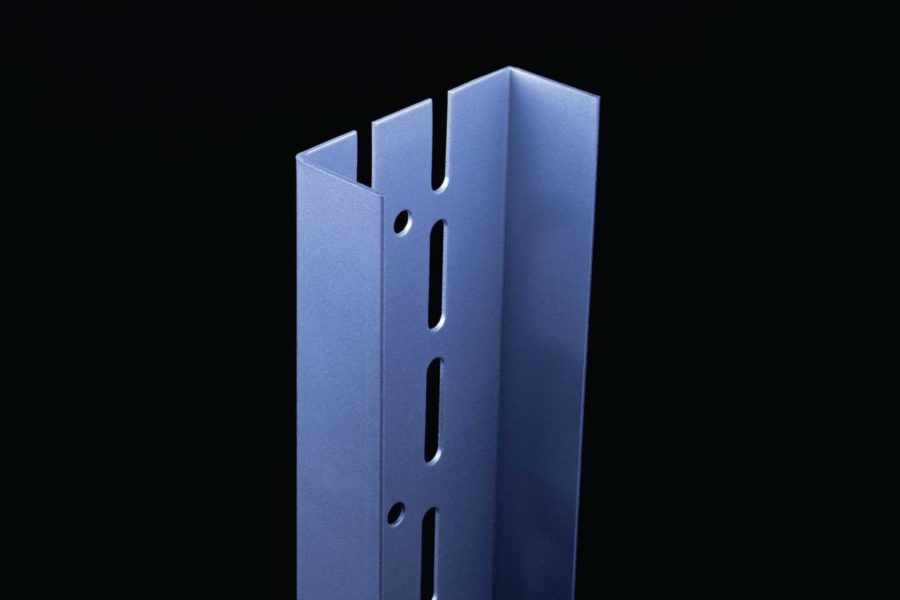
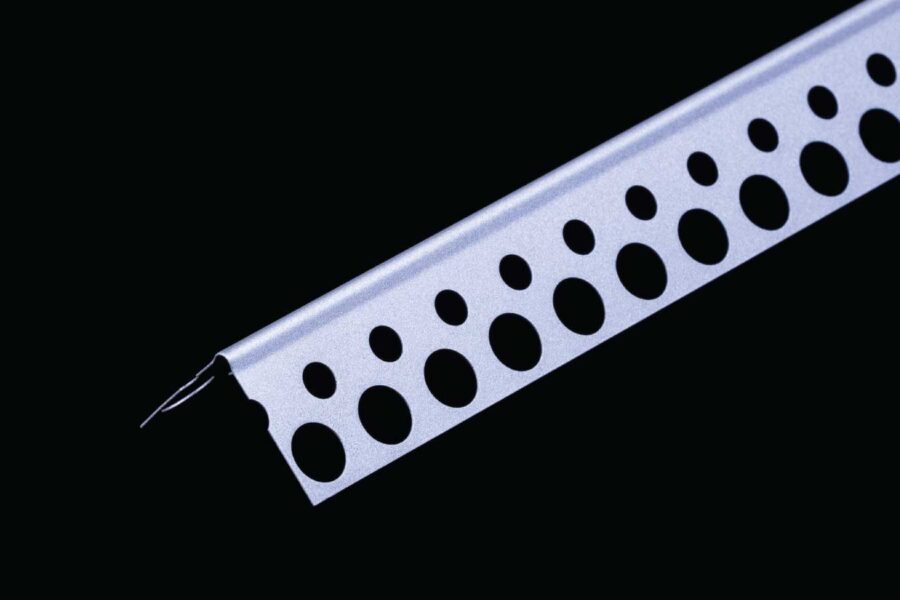
Firstly, it is lighter than traditional masonry walls and therefore puts less strain on the ceilings. The lightweight plasterboard structure can be assembled quickly and easily, and in the event of a change of use of the room or remodelling, the walls can be easily dismantled to remove them or erected in a new location. Using wall arched profile U, we can arrange our rooms in an interesting way, e.g. by building arched walls. Further advantages of plasterboard walls are very good acoustic performance and high fire resistance. The use of 50,75 or 100 mm profile walls and plasterboard offers savings on interior space. In addition, plasterboard has a smooth surface, which is difficult to achieve with traditional plaster. Plasterboard is a great substrate for painting, wallpapering or ceramic tiles. The advantage of gypsum (also plasterboard) is its ability to absorb excess moisture from the air and give it back when the air is too dry. This creates a favourable microclimate in the rooms.


All the advantages listed contribute to lower construction costs. There is no need for process interruptions associated with plaster drying or unfavourable weather.

Before we start installing the lightweight construction walls, we need to precisely delineate the lines of the walls and select the appropriate wall thickness (50,75 or 100 mm). Correct and precise line drawing will affect the final result of the work. The simplest tool for this activity is the scribe cord.


Once the appropriate wall thickness has been decided (the wall thickness depends on the height of the wall to be built, the sound insulation, the number of board layers and the installations that need to be concealed) and all the wall lines have been marked out, we proceed to fix the U-profiles to the floor and ceiling, and the C-profiles to the wall. The profiles in contact with the wall and floor are covered with special acoustic tape before fixing. Acoustic tape will significantly improve the acoustic performance and reduce the transmission of sound from neighbouring rooms.


The profiles are mounted to the substrate using quick-action fasteners. The stud spacing depends on where the profiles are attached. When profile C is fixed to the wall, we use min. 3 dowels per 3 metres of room height. The U-profiles are mounted to the floor and ceiling with dowels at 1m intervals. It is important that the pegs are secured in a stable substrate. With weaker foundations, we can reduce the stud spacing.


Once the U-profiles and starter C-profiles have been attached, we proceed to measure the exact height of the room and cut the C-profiles to the desired height. When cutting profiles, the clearance in height must be taken into account. Vertical C-profiles should be 10 – 15 mm shorter than the room height. C-profiles are set at a distance of 30 to 60 cm between posts, depending on the type of wall, height and cladding to be used. Remember not to screw the vertical C-pillars to the horizontal U-pillars. Screw only the plate.  When assembling a steel profile wall, profiles should be avoided as far as possible. Profiles should be purchased in lengths closest to the desired dimension, or slightly longer. If we have to extend the profiles by means of moulding, we have to remember the rule that the overlap in the profile must be at least 40 cm and must not be in the same line, but alternate, e.g. moulding at the top, another at the bottom, another at the top and so on.


At the door openings, a reinforced UA profile fixed to the substrate with squares for frame profiles and M8 screws with washer should be used. UA profiles can also be used to reinforce the outer edge of a free-standing wall.


Once the entire wall structure is in place, we proceed with the installation of the plasterboard.


The board is fastened with TN25 quick-action screws (for single boarding) or TN 35 for double boarding. Countersink the screw into the panel by approximately 0.5 mm. This will allow the board to be puttied and hidden where it is screwed in place. Fix the panels halfway across the width of the C-pillar so that the two panels butt together and both are fixed. Care should be taken to ensure that there are no gaps between the panels. Too much putty can crack as a result of shrinkage.


The boards, like the profiles, are best bought to the size closest to that desired. If we already have to piece the panels, remember to avoid a single-line installation. We arrange all the joints of the board in such a way that they are not in one line. The board joints are secured with reinforcing tape to protect the joint from subsequent cracking.

Before fixing the panel on the other side of the wall, any necessary installations that have been provided for the wall must be carried out. There are special notches in the C-profiles for installation. The next step is to fill the space between the C-profiles with mineral or rock wool.


Wool in board form is best for this, as there will be no problem with wool sagging in the wall over time. For acoustic reasons, the wool on one side should not come into contact with the board. For this purpose, the wool should be 1 cm thinner than the thickness of the profiles, e.g. for C50 profiles we use 4 cm wool. The opposite is true, however, for the width of the wool. It should be 1 cm wider than the spacing between the profiles so that when pressed in, the wool fills the space between the C-pillars exactly. With the wall thus prepared, we can proceed to the final phase – fitting the board on the other side. Arrange the board so that the joints have an offset from the boards on the opposite side of the wall and fall on the next post.

Before filling the joints between the boards, the surface should be dusted off and primed with a suitable primer.  The joint compound is pressed into the joints prepared in this way as deeply as possible so that it fills the entire joint. Spread the mixture thoroughly and smooth it out. Apply reinforcing tape to the filled joint and dip it into the compound. The tape is intended to protect the joint from cracking.

PRODUCTS

ściany profil C

Profiles

This is the main element of the plasterboard wall structure

ściany profil UA

Frame profiles

The UA profiles are used in doorways

ściany narożnik aluminiowy

Corners

They protect corners against damage